Why You’ll Love This Recipe
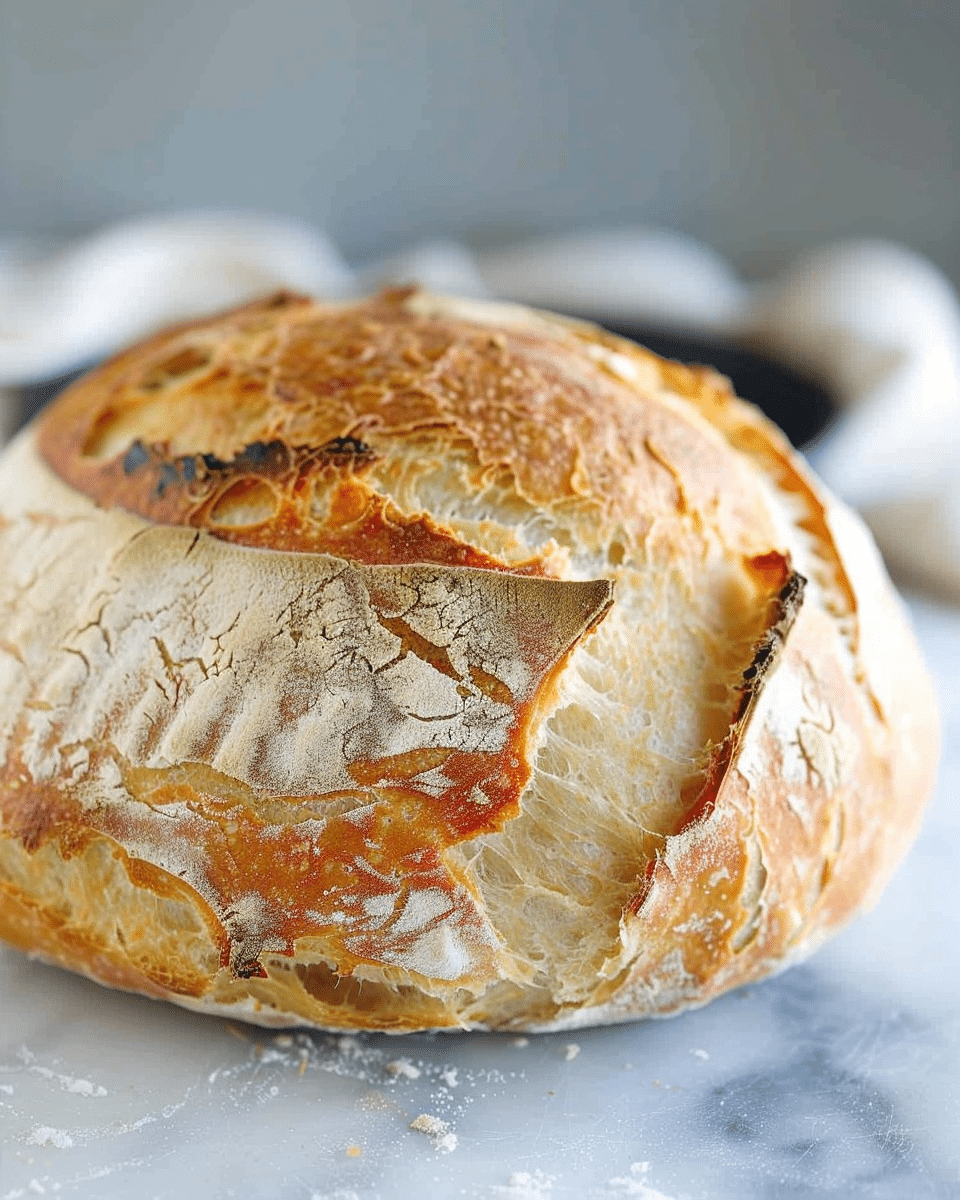
Sourdough bread is a timeless classic, known for its unique flavor and chewy, airy texture. This beginner-friendly recipe removes the complexity often associated with sourdough and breaks down the process into easy-to-follow steps. The result? A delicious homemade loaf that has a crispy crust, tangy flavor, and soft, airy crumb—just like you’d get from a bakery! Whether you’re new to baking or just new to sourdough, this recipe is a great starting point for mastering the art of bread baking.
Ingredients
For the Sourdough Starter:
-
1/2 cup whole wheat flour
-
1/2 cup water (filtered or non-chlorinated)
-
1/4 teaspoon active dry yeast (optional, to kick-start the process)
For the Bread:
-
1 1/2 cups active sourdough starter (see instructions for making the starter)
-
1 1/2 cups all-purpose flour (plus extra for dusting)
-
1 cup warm water
-
1 teaspoon salt
-
1 teaspoon sugar (optional, to enhance fermentation)
(Tip: You’ll find the full list of ingredients and measurements in the recipe card below.)
Directions
Step 1: Make the Sourdough Starter
-
Mix the Starter:
-
In a clean jar or container, combine 1/2 cup whole wheat flour and 1/2 cup water. Stir well to form a thick paste. Cover loosely with a lid or cloth and let it sit at room temperature for 24 hours.
-
-
Feed the Starter:
-
After 24 hours, discard half of the mixture and feed the starter with another 1/2 cup water and 1/2 cup flour. Stir, cover, and let it sit at room temperature for another 24 hours. Continue this process for 5-7 days, until the starter is bubbly, fragrant, and has a slight sour smell.
-
Step 2: Make the Dough
-
Mix the Dough:
-
In a large bowl, combine 1 1/2 cups of the active sourdough starter, 1 1/2 cups all-purpose flour, and 1 cup warm water. Stir until all ingredients are well combined, forming a rough dough.
-
-
Add Salt and Sugar:
-
Add 1 teaspoon salt and 1 teaspoon sugar (optional), then knead the dough for about 5-7 minutes on a clean surface until it becomes smooth and elastic. You can also knead the dough in the bowl for a few minutes to bring it together before transferring it to your work surface.
-
-
Let the Dough Rest:
-
Cover the dough with a damp towel or plastic wrap and let it rest for 1-2 hours, or until it has doubled in size. You can also let the dough rest in a warm place, such as in the oven with just the light on.
-
Step 3: Shape and Proof the Dough
-
Shape the Dough:
-
Once the dough has risen, gently punch it down to release the air and turn it out onto a floured surface. Shape the dough into a round or oval loaf, tucking in the edges underneath to create tension on the surface.
-
-
Final Proofing:
-
Place the shaped dough into a lightly floured proofing basket or bowl lined with a floured cloth. Cover the dough and let it rise for 2-4 hours at room temperature or refrigerate overnight for a longer, slower proof. If refrigerating, remove the dough 1-2 hours before baking to bring it to room temperature.
-
Step 4: Bake the Sourdough
-
Preheat the Oven:
-
Preheat your oven to 450°F (230°C) and place a Dutch oven or baking pot with a lid inside to heat. This step helps create the steam necessary for a crispy crust.
-
-
Score the Dough:
-
Just before baking, gently flip the dough onto a piece of parchment paper. Using a sharp knife or bread lame, score the top of the dough in a pattern (like a cross or simple lines). This allows the bread to expand during baking.
-
-
Bake the Bread:
-
Place the dough, with parchment paper, into the preheated Dutch oven. Cover with the lid and bake for 30 minutes. After 30 minutes, remove the lid and bake for an additional 15-20 minutes, or until the bread is golden-brown and sounds hollow when tapped on the bottom.
-
Step 5: Cool and Serve
-
Cool the Bread:
-
Remove the bread from the oven and let it cool on a wire rack for at least 30 minutes before slicing. This allows the crumb to set and prevents it from being too doughy inside.
-
Servings and Timing
-
Servings: This recipe makes 1 loaf, which typically serves 6-8 people.
-
Preparation Time: 15 minutes for the dough (plus resting/proofing time)
-
Baking Time: 45-50 minutes
-
Total Time: 1-2 days (including sourdough starter preparation)
Variations
-
Add Seeds or Nuts: Incorporate sunflower seeds, sesame seeds, or chopped nuts into the dough during the final kneading for added texture.
-
Flavored Sourdough: Add herbs such as rosemary, thyme, or garlic to the dough for an aromatic twist.
-
Whole Wheat Version: Replace up to half of the all-purpose flour with whole wheat flour for a heartier loaf.
Storage/Reheating
-
Storage: Store the bread in a paper bag or bread box at room temperature for up to 3 days. For longer storage, freeze the loaf in an airtight container for up to 3 months.
-
Reheating: To reheat, wrap the bread in foil and place it in the oven at 350°F (175°C) for 10-15 minutes.
FAQs
1. How do I know if my sourdough starter is ready?
Your starter is ready when it’s bubbly, has doubled in size within 4-6 hours of feeding, and has a mildly sour smell. It should pass the “float test,” where a small spoonful of starter floats in water.
2. Can I make this recipe without a Dutch oven?
Yes, you can bake the bread on a baking sheet, but using a covered baking dish or Dutch oven helps create the steam needed for a crispy crust.
3. Can I use store-bought starter instead of making my own?
Yes, you can purchase a pre-made sourdough starter from many bakeries or online shops. Just feed it and use it as directed in the recipe.
4. Can I speed up the fermentation process?
If you’re in a hurry, you can use a warm place to help the dough rise faster, but slow fermentation (especially in the fridge) develops more flavor and texture in the bread.
5. How can I tell when the bread is fully baked?
The bread is done when it’s golden brown on top, and the bottom sounds hollow when tapped. You can also use a thermometer; the internal temperature of the bread should be about 200°F (93°C).
6. Can I add other ingredients like olives or cheese to the dough?
Yes, you can fold in other ingredients, like olives, cheese, or sun-dried tomatoes, during the final kneading step to create a flavorful variation.
7. Can I make a smaller batch of sourdough?
Yes, you can scale down the recipe to make a smaller loaf. Just reduce the ingredients accordingly, and adjust the proofing and baking times.
8. Why is my sourdough dense?
Dense sourdough can be caused by under-proofing, too much flour in the dough, or insufficient kneading. Ensure you’re letting the dough rise fully and not overworking it during the kneading process.
9. How can I make the crust softer?
For a softer crust, you can cover the bread with foil during the last 10 minutes of baking or bake it without the Dutch oven.
10. How do I maintain my sourdough starter?
Feed your starter regularly (every 1-2 days) with equal parts flour and water. Keep it in a warm place and discard half before each feeding to maintain its strength.
Conclusion
This Beginner’s Sourdough Bread recipe is a great way to start baking your own homemade bread. With a little patience and a few basic ingredients, you’ll have a beautiful loaf of sourdough that’s crispy on the outside and soft on the inside. The tangy flavor, chewy texture, and artisan appearance will impress anyone who tastes it—and you’ll feel a sense of accomplishment knowing you made it from scratch!

Beginner’s Sourdough Bread
- Author: Lisa
- Prep Time: 15 minutes
- Cook Time: 45 minutes
- Total Time: 1-2 days
- Yield: 1 loaf (serves 6–8)
- Category: Bread
- Method: Baking
- Cuisine: American
- Diet: Vegetarian
Description
This Beginner’s Sourdough Bread recipe guides first-time bakers through the process of creating a rustic, tangy loaf with a crispy crust and airy crumb using a homemade sourdough starter.
Ingredients
- 1/2 cup whole wheat flour (for starter)
- 1/2 cup water, filtered or non-chlorinated (for starter)
- 1/4 teaspoon active dry yeast (optional, for starter)
- 1 1/2 cups active sourdough starter
- 1 1/2 cups all-purpose flour (plus extra for dusting)
- 1 cup warm water
- 1 teaspoon salt
- 1 teaspoon sugar (optional)
Instructions
- Make the Starter: In a jar, mix 1/2 cup whole wheat flour and 1/2 cup water. Stir, cover loosely, and let sit at room temperature for 24 hours.
- Feed the Starter: Discard half, then add 1/2 cup flour and 1/2 cup water daily for 5–7 days until bubbly and fragrant.
- Mix the Dough: In a bowl, combine 1 1/2 cups active starter, 1 1/2 cups flour, and 1 cup water. Stir to form a rough dough.
- Add Salt and Sugar: Add salt and optional sugar, then knead for 5–7 minutes until smooth and elastic.
- Let Rest: Cover dough and let it rise for 1–2 hours until doubled in size.
- Shape the Dough: Punch down dough, turn onto floured surface, and shape into a round or oval loaf.
- Final Proof: Place dough in a floured proofing basket or lined bowl. Cover and let rise 2–4 hours or refrigerate overnight.
- Preheat Oven: Heat oven to 450°F (230°C) with a Dutch oven inside.
- Score the Dough: Flip dough onto parchment, score the top with a sharp knife or lame.
- Bake: Place dough in Dutch oven. Cover and bake for 30 minutes, then uncover and bake 15–20 minutes more.
- Cool: Remove bread and let cool on wire rack for at least 30 minutes before slicing.
Notes
Use filtered or non-chlorinated water for best fermentation results.Refrigerating the dough overnight enhances flavor and texture.Scoring the dough helps control expansion during baking.Ensure the starter is active and bubbly before using.
Nutrition
- Serving Size: 1 slice (1/8 loaf)
- Calories: 150
- Sugar: 0.5g
- Sodium: 290mg
- Fat: 0.5g
- Saturated Fat: 0g
- Unsaturated Fat: 0.5g
- Trans Fat: 0g
- Carbohydrates: 30g
- Fiber: 1g
- Protein: 4g
- Cholesterol: 0mg


