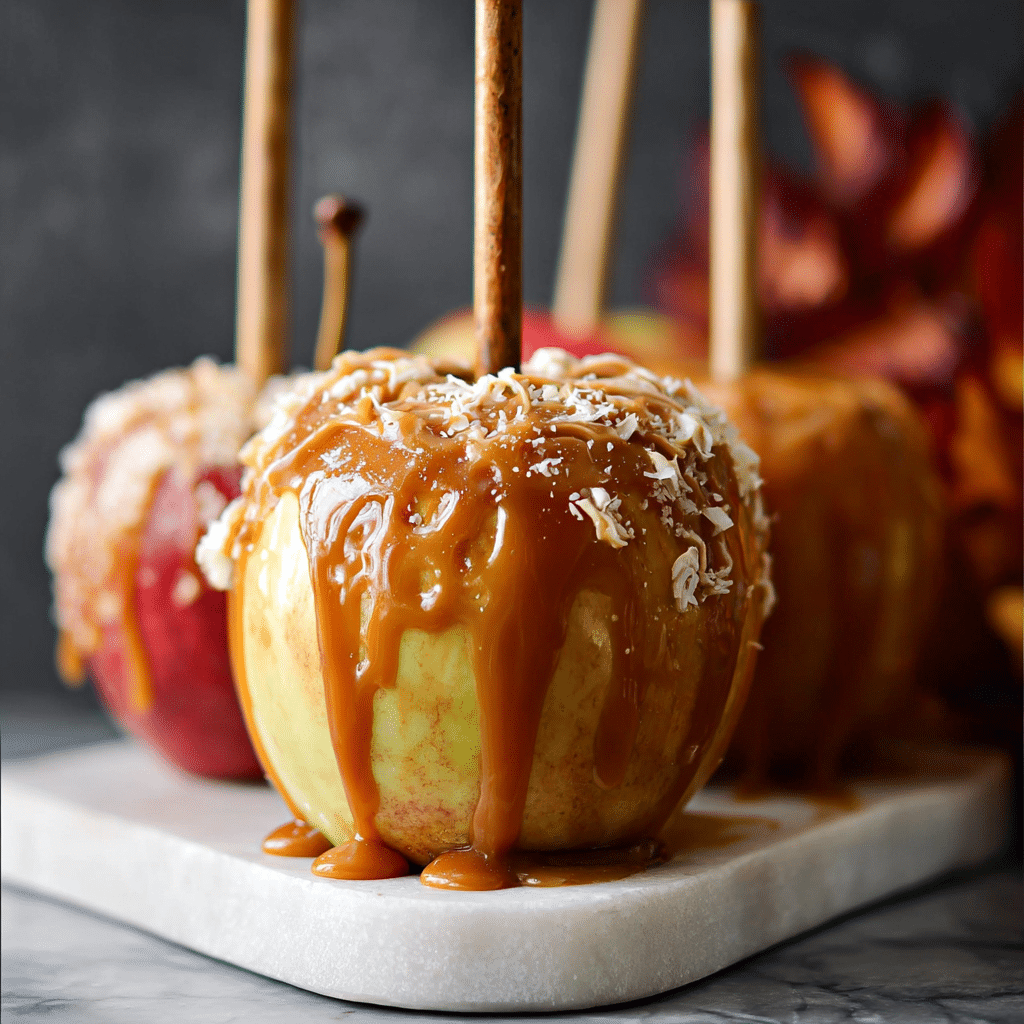
There’s something nostalgic and comforting about caramel apples. The crisp, slightly tart apple pairs perfectly with the smooth, sweet caramel coating, creating a satisfying contrast in both flavor and texture.
This recipe is simple enough for beginners and fun to make with family or friends. With just a few basic ingredients, you can create a bakery-style treat right at home.
They’re also easy to customize. From chopped nuts to chocolate drizzle and colorful sprinkles, you can decorate them to match any occasion or celebration.
Ingredients
(Tip: You’ll find the full list of ingredients and measurements in the recipe card below.)
firm apples (such as Granny Smith or Honeycrisp) soft caramel candies or homemade caramel heavy cream or milk wooden sticks optional toppings such as chopped nuts, sprinkles, crushed cookies, or melted chocolate
Directions
Wash and thoroughly dry the apples. Remove any wax coating by rubbing them with warm water and drying completely.
Insert a wooden stick firmly into the top of each apple.
Line a baking sheet with parchment paper and lightly grease it.
In a saucepan over low heat, melt the caramel candies with heavy cream or milk, stirring constantly until smooth.
Allow the caramel to cool slightly for a few minutes so it thickens.
Dip each apple into the caramel, turning to coat evenly. Let excess caramel drip off.
If using toppings, roll or sprinkle them onto the caramel while it’s still soft.
Place the coated apples on the prepared baking sheet.
Refrigerate for at least 30–45 minutes, or until the caramel is fully set.
Servings and timing
Servings: 6 apples
Prep time: 15 minutes Cook time: 10 minutes Chill time: 30–45 minutes Total time: Approximately 1 hour
Variations
For a chocolate caramel apple, drizzle melted dark or white chocolate over the set caramel.
Add a sprinkle of sea salt on top for a salted caramel version.
Roll the apples in crushed pretzels for a sweet and salty crunch.
You can also use different apple varieties for varied flavor profiles, such as Fuji for extra sweetness or Granny Smith for a tart contrast.
Storage/Reheating
Store caramel apples in the refrigerator for up to 3 days. Wrap each apple individually in plastic wrap to keep them fresh.
For best texture, allow them to sit at room temperature for 10–15 minutes before eating so the caramel softens slightly.
Freezing is not recommended, as it can affect the texture of both the apple and the caramel.
FAQs
What apples work best for caramel apples?
Firm, crisp apples like Granny Smith, Honeycrisp, or Fuji hold up best and provide great flavor contrast.
Why won’t the caramel stick to my apples?
Apples are often coated with wax. Be sure to wash and dry them thoroughly before dipping.
Can I use homemade caramel instead of candies?
Yes, homemade caramel works beautifully as long as it’s thick enough to coat the apples.
How do I keep caramel from pooling at the bottom?
Let the caramel cool slightly before dipping and allow excess to drip off before placing on parchment.
Can I make these ahead of time?
Yes, they can be made a day in advance and stored in the refrigerator.
How do I cut caramel apples easily?
Use a sharp knife and slice carefully. Letting the apple sit at room temperature for a few minutes makes slicing easier.
Can I add food coloring to the caramel?
Gel food coloring can be used, but it may slightly alter the texture.
How do I prevent air bubbles in the caramel?
Dip the apples slowly and tap gently to release trapped air.
Can I use dairy-free caramel?
Yes, use dairy-free caramel and plant-based cream alternatives if needed.
Are caramel apples safe to leave out?
They can sit at room temperature for a few hours, but refrigeration is recommended for longer storage.
Conclusion
Easy Homemade Caramel Apples are a timeless treat that combines crisp fruit with smooth, buttery caramel. Simple to prepare and endlessly customizable, they’re perfect for celebrations, seasonal gatherings, or whenever you want a fun and delicious homemade dessert.
Easy Homemade Caramel Apples are a classic fall treat made with crisp apples dipped in rich, buttery caramel and customized with your favorite toppings. These homemade caramel apples are simple to prepare, perfect for holidays and parties, and deliver the perfect balance of sweet, creamy caramel and fresh apple crunch.
Ingredients
6 firm apples (such as Granny Smith, Honeycrisp, or Fuji)
11 oz soft caramel candies (about 1 standard bag)
2 tablespoons heavy cream or milk
6 wooden sticks
Optional toppings: chopped nuts, sprinkles, crushed cookies, mini chocolate chips, melted chocolate, sea salt
Instructions
Wash apples thoroughly and remove any wax coating by rinsing in warm water and drying completely.
Insert a wooden stick firmly into the top center of each apple.
Line a baking sheet with parchment paper and lightly grease it.
In a saucepan over low heat, melt caramel candies with heavy cream, stirring constantly until smooth.
Remove from heat and allow caramel to cool for 3–5 minutes to slightly thicken.
Dip each apple into the caramel, turning to coat evenly. Let excess caramel drip off.
Immediately roll or sprinkle with desired toppings while caramel is still soft.
Place apples on prepared baking sheet.
Refrigerate for 30–45 minutes, or until caramel is fully set.
Notes
Dry apples completely before dipping to help caramel adhere.Allow caramel to cool slightly before dipping to prevent pooling at the base.Let apples sit at room temperature for 10–15 minutes before serving for easier slicing.Avoid freezing, as it can affect texture.


