Why You’ll Love This Recipe
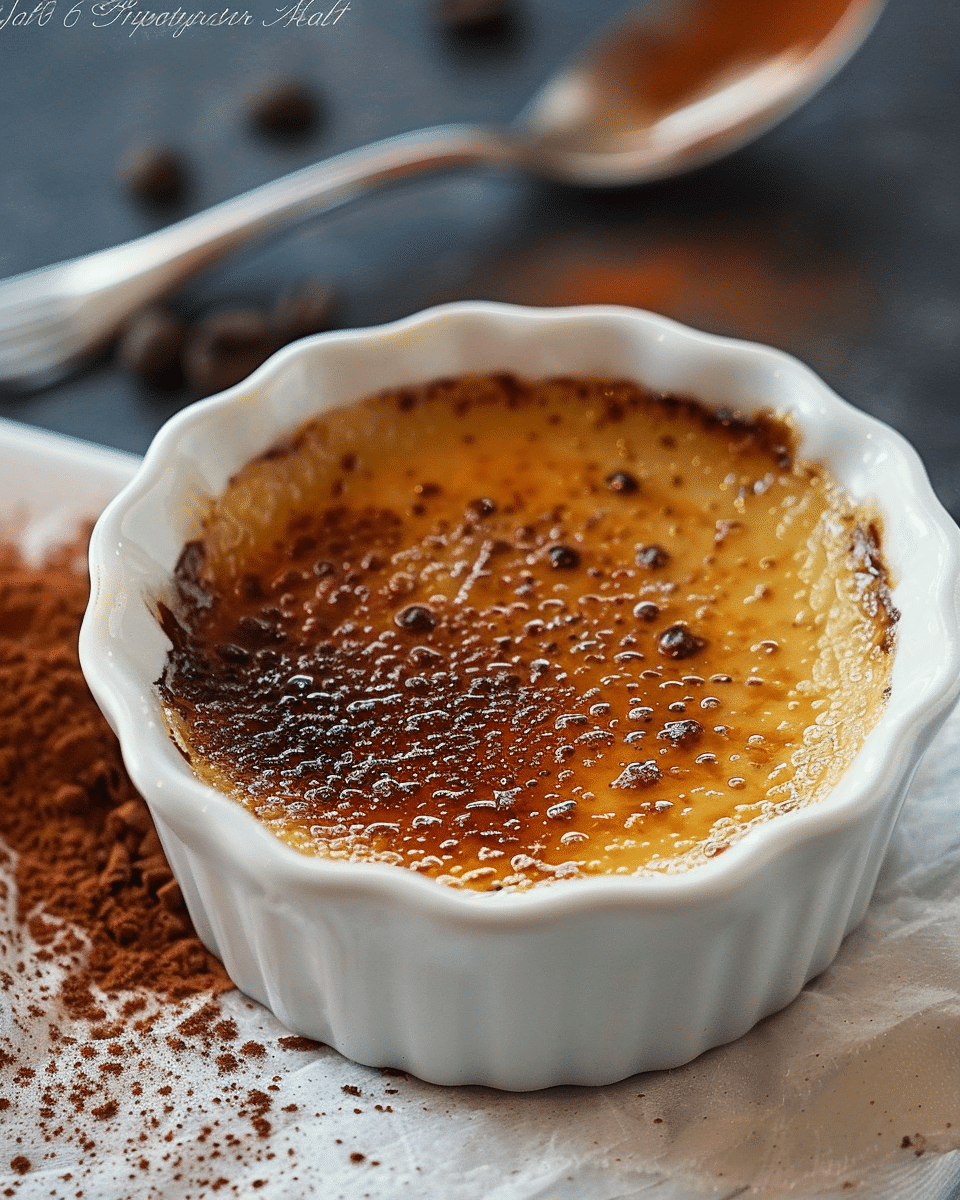
Espresso Crème Brûlée is a luxurious dessert that’s both sophisticated and indulgent. The creamy custard is infused with espresso, giving it a rich coffee flavor that complements the sweetness of the sugar crust perfectly. The contrast between the silky smooth custard and the crisp, caramelized top is what makes crème brûlée so special, and the addition of espresso elevates it even further. This dessert is surprisingly easy to make at home, and the result is a decadent treat that’s sure to wow your guests or provide a comforting, cafe-inspired indulgence.
Ingredients
(Tip: You’ll find the full list of ingredients and measurements in the recipe card below.)
For the Custard:
-
2 cups heavy cream
-
1 tablespoon espresso powder (or 1 shot of strong brewed espresso)
-
5 large egg yolks
-
1/2 cup granulated sugar
-
1 teaspoon vanilla extract
-
Pinch of salt
For the Topping:
-
2-3 tablespoons granulated sugar (for caramelizing)
Directions
Preparing the Custard:
-
Infuse the cream with espresso: In a medium saucepan, heat the heavy cream over medium heat. Once the cream is warm (but not boiling), whisk in the espresso powder until it’s fully dissolved. If you’re using brewed espresso, add it to the cream and stir until combined. Remove the cream from heat and let it cool slightly.
-
Whisk the egg yolks and sugar: In a separate bowl, whisk together the egg yolks, sugar, vanilla extract, and a pinch of salt until the mixture is pale and smooth.
-
Temper the egg mixture: Gradually add a small amount of the warm espresso-infused cream into the egg yolk mixture, whisking constantly to temper the eggs. Slowly pour the rest of the warm cream into the egg mixture while continuing to whisk. This will prevent the eggs from curdling.
-
Strain the custard: For a smooth custard, strain the mixture through a fine-mesh sieve into a clean bowl to remove any cooked egg bits.
Baking the Crème Brûlée:
-
Prepare the ramekins: Preheat your oven to 325°F (163°C). Place 4 ramekins in a baking dish or roasting pan. Make sure the ramekins are evenly spaced.
-
Pour the custard: Divide the custard mixture evenly among the ramekins, filling each one nearly to the top.
-
Bake in a water bath: Carefully pour hot water into the baking dish around the ramekins, filling it halfway up the sides of the ramekins. This water bath ensures even cooking and prevents the custard from curdling.
-
Bake: Bake the crème brûlée for 40-45 minutes, or until the edges are set but the center is still slightly jiggly. You can test doneness by gently tapping the side of the ramekin—the custard should wiggle slightly in the center. Remove the ramekins from the water bath and let them cool to room temperature. Then refrigerate for at least 2 hours, or up to overnight.
Caramelizing the Sugar:
-
Sprinkle the sugar: Once the custards are chilled and ready to serve, sprinkle an even layer of granulated sugar over the top of each custard.
-
Caramelize the sugar: Use a kitchen torch to carefully melt and caramelize the sugar until it’s golden brown and crispy. Hold the torch a few inches above the surface of the custard, moving it in small circular motions until the sugar is evenly caramelized. If you don’t have a kitchen torch, you can also broil the crème brûlées in the oven for 1-2 minutes, watching them closely to ensure they don’t burn.
Serving:
Allow the crème brûlée to sit for a minute or two to let the caramelized sugar harden before serving. Enjoy the beautiful contrast of creamy custard and crispy, caramelized sugar in each bite!
Servings and Timing
-
Servings: 4
-
Prep Time: 20 minutes
-
Cook Time: 40-45 minutes
-
Chill Time: 2 hours (or overnight)
-
Total Time: 3 hours 10 minutes (including chilling time)
Variations
-
Vanilla Bean Espresso Crème Brûlée: Add a split vanilla bean to the cream mixture along with the espresso for a more complex flavor.
-
Chocolate Espresso Crème Brûlée: Stir in 2 ounces of melted dark chocolate into the custard mixture for a chocolatey twist on the classic.
-
Flavored Espresso: Experiment with flavored espresso, such as hazelnut or caramel, to create a unique variation of this dessert.
-
Decaf Espresso: If you want to enjoy this dessert in the evening without the caffeine, you can use decaffeinated espresso or coffee.
Storage/Reheating
-
Storage: Keep the crème brûlées in the refrigerator, covered loosely with plastic wrap, for up to 2-3 days. It’s best to caramelize the sugar right before serving for the best texture.
-
Reheating: While the custard can be refrigerated, the sugar topping should be freshly caramelized just before serving for the best crispy texture.
FAQs
Can I use regular coffee instead of espresso powder?
Yes, you can substitute espresso powder with instant coffee or regular brewed coffee, but espresso powder will give a more intense, rich flavor. Use about 1-2 tablespoons of instant coffee in place of the espresso powder.
Can I make crème brûlée without a torch?
Yes, you can broil the sugar topping in the oven instead of using a torch. Set your oven to broil, and place the ramekins under the broiler for 1-2 minutes, watching closely to prevent burning.
Can I make this ahead of time?
Yes, crème brûlée is a great make-ahead dessert. You can prepare the custards the day before, chill them overnight, and caramelize the sugar right before serving.
Can I make this dessert without dairy?
To make this dessert dairy-free, you can substitute the heavy cream with coconut cream or a dairy-free heavy cream alternative. The texture will be slightly different, but it will still be delicious!
Can I add a flavored syrup to the custard?
Yes, you can experiment with adding flavored syrups like caramel or hazelnut to the custard mixture for an extra layer of flavor.
Conclusion
Espresso Crème Brûlée is a rich, indulgent dessert that perfectly blends the bold flavor of espresso with the smoothness of classic crème brûlée. The combination of a creamy custard base, a golden, crunchy sugar topping, and the deep coffee flavor makes this dessert a showstopper. Whether you’re serving it for a special occasion or a cozy dinner, this elegant treat is sure to delight your guests and satisfy your cravings for something luxurious and comforting.
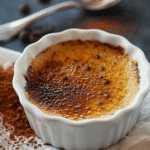
Espresso Crème Brûlée
- Prep Time: 20 minutes
- Cook Time: 40 minutes
- Total Time: 3 hours 10 minutes
- Yield: 4 servings
- Category: Dessert
- Method: Baking
- Cuisine: French
- Diet: Vegetarian
Description
Espresso Crème Brûlée is an elegant twist on the classic French dessert, infusing the creamy custard with bold espresso flavor. Topped with a perfectly crisp caramelized sugar crust, this indulgent treat offers the perfect balance of smooth and crunchy textures, making it a must-try for coffee lovers.
Ingredients
For the Custard:
-
2 cups heavy cream
-
1 tablespoon espresso powder (or 1 shot of strong brewed espresso)
-
5 large egg yolks
-
½ cup granulated sugar
-
1 teaspoon vanilla extract
-
Pinch of salt
For the Topping:
- 2–3 tablespoons granulated sugar (for caramelizing)
Instructions
-
Preparing the Custard:
-
Infuse the cream with espresso: In a medium saucepan, heat the heavy cream over medium heat. Once warm (but not boiling), whisk in espresso powder until fully dissolved. If using brewed espresso, add it directly to the cream and stir until combined. Remove from heat and let it cool slightly.
-
Whisk the egg yolks and sugar: In a separate bowl, whisk the egg yolks, sugar, vanilla extract, and a pinch of salt until smooth and pale.
-
Temper the egg mixture: Gradually pour a small amount of the warm cream into the egg yolk mixture while whisking constantly to temper the eggs. Slowly pour the remaining cream into the egg mixture while continuing to whisk.
-
Strain the custard: Strain the custard through a fine-mesh sieve to remove any cooked egg bits.
-
-
Baking the Crème Brûlée:
-
Prepare the ramekins: Preheat your oven to 325°F (163°C). Place 4 ramekins in a baking dish or roasting pan, ensuring they’re evenly spaced.
-
Pour the custard: Divide the custard evenly among the ramekins, filling them nearly to the top.
-
Bake in a water bath: Carefully pour hot water into the baking dish, filling it halfway up the sides of the ramekins. This water bath helps cook the custard evenly and prevents curdling.
-
Bake: Bake for 40-45 minutes, or until the edges are set but the center is still slightly jiggly. Test by gently tapping the side of the ramekin—the custard should wiggle slightly.
-
Cool and refrigerate: Remove the ramekins from the water bath and allow them to cool to room temperature. Refrigerate for at least 2 hours, or up to overnight.
-
-
Caramelizing the Sugar:
-
Sprinkle sugar: Once the custards are chilled and ready to serve, sprinkle an even layer of granulated sugar on top of each custard.
-
Caramelize the sugar: Use a kitchen torch to carefully melt and caramelize the sugar until golden brown and crispy. Hold the torch a few inches above the surface, moving it in small circular motions until the sugar is evenly caramelized. Alternatively, broil in the oven for 1-2 minutes, keeping a close eye to avoid burning.
-
-
Serving:
-
Let the crème brûlée sit for a minute to allow the caramelized sugar to harden. Serve and enjoy the contrast between the creamy custard and the crispy, caramelized sugar!
-
Notes
Make-Ahead: Crème brûlée is ideal for making ahead. Prepare the custard the day before and caramelize the sugar right before serving.Storage: Store leftovers in the refrigerator, loosely covered, for up to 2-3 days.Variations: Add a vanilla bean to the cream for a deeper flavor or stir in melted chocolate for a chocolatey twist.

