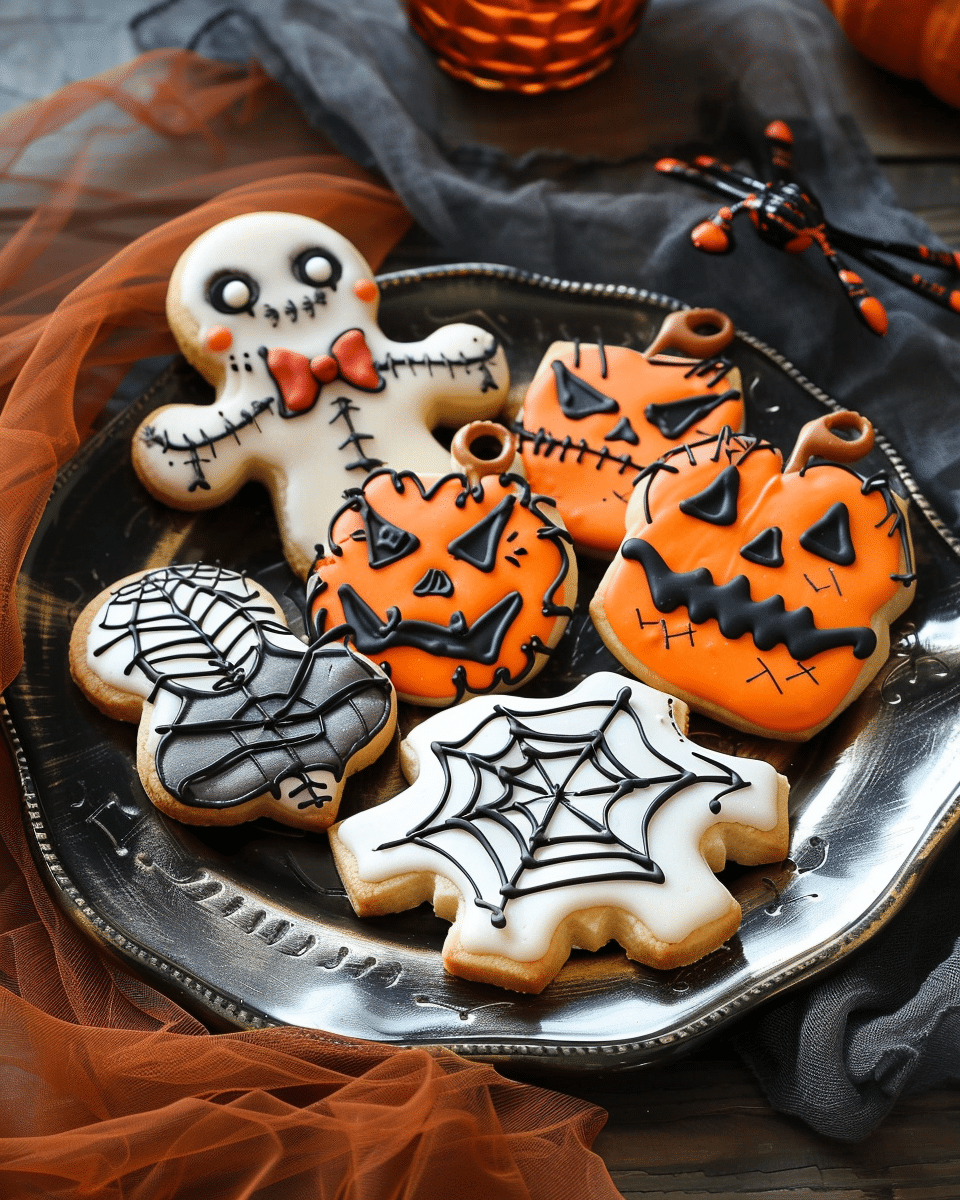
These cookies are festive, creative, and endlessly customizable. You can keep them simple with spooky shapes or go all out with piped frosting, candy eyes, and gory designs. The base is a buttery sugar cookie that holds its shape well and pairs perfectly with any decorations you choose. Great for baking with kids or setting up a Halloween decorating station, they’re a guaranteed hit.
Ingredients
(Tip: You’ll find the full list of ingredients and measurements in the recipe card below.)
All-purpose flour
Baking powder
Salt
Unsalted butter
Granulated sugar
Egg
Vanilla extract
Optional: almond extract
Royal icing or buttercream for decorating
Gel food coloring (black, red, green, purple, etc.)
Candy eyes, sprinkles, mini marshmallows, chocolate chips
Directions
In a medium bowl, whisk together flour, baking powder, and salt. Set aside.
In a large mixing bowl, cream butter and sugar until light and fluffy.
Beat in the egg and vanilla extract until combined.
Gradually add the dry ingredients to the wet mixture, mixing until dough forms.
Divide dough in half, flatten into discs, and chill for at least 1 hour.
Preheat oven to 350°F (175°C). Line baking sheets with parchment paper.
Roll out chilled dough on a floured surface to about ¼ inch thick. Cut into spooky shapes with Halloween cookie cutters (ghosts, bats, pumpkins, etc.).
Transfer to baking sheets and bake for 8–10 minutes or until edges are lightly golden.
Let cookies cool completely before decorating.
Use royal icing or buttercream to decorate with spooky designs: mummy bandages, blood splatters, stitched-up mouths, monster faces, and more.
Servings and timing
This recipe makes about 24 cookies depending on the size of your cutters. Prep time: 20 minutes Chill time: 1 hour Cook time: 10 minutes Decorating time: 30–60 minutes Total time: about 2 hours
Variations
Chocolate Cookie Base: Add cocoa powder for dark, rich cookies.
Bloody Bites: Shape like fangs and drizzle with red icing for a vampire look.
Mummy Cookies: Pipe thin white icing strips across round cookies and stick on candy eyes.
Monster Faces: Use bright colors and candy to create silly or scary monster designs.
Witch Fingers: Shape dough into long fingers, press in almond “nails,” and add red gel for blood.
Storage/Reheating
Store decorated cookies in an airtight container at room temperature for up to 5 days. Undecorated cookies can be frozen for up to 3 months; thaw before decorating. To keep cookies crisp, store with parchment between layers and avoid humidity.
FAQs
Can I use store-bought cookie dough?
Yes, but homemade dough holds shape better for detailed designs.
What kind of icing works best for decorating?
Royal icing is best for precise designs and drying firm. Buttercream is softer and great for texture.
Can kids help decorate?
Absolutely—set out sprinkles, icing, and candy for a fun, mess-friendly activity.
How do I keep the cookies from spreading?
Chill the dough and make sure the baking sheet isn’t warm before placing cutouts on it.
Can I make the dough ahead of time?
Yes, the dough can be chilled for up to 3 days or frozen for a month.
How do I color icing?
Use gel food coloring for vibrant colors without thinning the icing too much.
Do I need cookie cutters?
They help, but you can also cut shapes with a knife or use simple circles for mummy or monster faces.
Can I use natural food coloring?
Yes, but results may be softer. Beet powder, matcha, and turmeric can work for subtle tones.
What’s the best way to pipe fine details?
Use a piping bag with a small round tip or a zip-top bag with the corner snipped off.
How long does the icing take to set?
Royal icing dries in 4–6 hours. For quicker results, use a fan or place cookies in front of a cool breeze.
Conclusion
Scary Halloween Cookies are a fun and festive way to celebrate the spooky season. Whether you’re going for terrifyingly detailed or playfully creepy, these cookies are a blank canvas for all your Halloween creativity. Bake a batch, grab your decorations, and let the frightful fun begin.
Scary Halloween Cookies are spooky, sweet sugar cookies decorated with icing, candy, and Halloween flair—perfect for parties, trick-or-treating, or festive baking fun with kids.
Ingredients
2 3/4 cups all-purpose flour
1 teaspoon baking powder
1/2 teaspoon salt
1 cup unsalted butter, softened
3/4 cup granulated sugar
1 large egg
1 teaspoon vanilla extract
Optional: 1/4 teaspoon almond extract
Royal icing or buttercream for decorating
Gel food coloring (black, red, green, purple, etc.)
Candy eyes, sprinkles, chocolate chips, mini marshmallows
Instructions
In a medium bowl, whisk together flour, baking powder, and salt. Set aside.
In a large bowl, cream butter and sugar until light and fluffy (2–3 minutes).
Beat in egg, vanilla extract, and almond extract if using.
Gradually mix in dry ingredients until dough forms.
Divide dough in half, shape into discs, and chill for at least 1 hour.
Preheat oven to 350°F (175°C) and line baking sheets with parchment paper.
Roll out dough on a floured surface to about 1/4 inch thick. Cut into spooky shapes using Halloween cookie cutters.
Place cookies on prepared sheets and bake for 8–10 minutes, or until edges are lightly golden.
Cool cookies completely before decorating.
Use royal icing or buttercream to create mummy stripes, bloody bites, monster faces, stitched mouths, or other scary designs. Add candy eyes and sprinkles as desired.
Notes
Chill dough to prevent cookies from spreading.Use gel food coloring for bold hues without thinning icing.Royal icing dries firm and is best for detailed designs; buttercream adds texture.Let royal icing set for several hours before stacking or packaging.Make dough ahead and refrigerate up to 3 days or freeze for longer storage.


